Friday, May 27, 2011

Homemade Mounds Bars


I want to share with you one of my favorite recipes, Mounds Bars. Mounds are my favorite candy bar and these homemade ones are scruptious. They are easy to make and are a great treat if you have a craving for some chocolately goodness. (You can easily turn them into ALmond Joys by adding some chopped almonds to the filling).


Mounds Bars


Crust:


Mix together 2c. crushed graham crackers, 1/2c. sugar, 1/2c. melted butter.


Mix and press into a lightly greased 9x13 pan. Bake at 350 6-8 minutes.


Filling:


Mix 1 can sweetened condensed milk and 1 small pkg. sweetened flaked coconut together.


Spread over warm graham cracker crust.


Bake at 350 for 15 - 20 minutes.


Topping:


Melt 1 1/2 c. semi-sweet chocolate chips and 2-3 tbsp creamy peanut butter in mircowave until smooth.


Spread over filling. Let bars cool completely before cutting.


Makes 24 bars.

Thursday, May 26, 2011

Birthday Banner Redo

I made this birthday banner last year from a tutorial over at polkadotchair.com . I cut the triangles with pinking sheers out of my fabrics then drew out lettering and used wonder under to iron them on. Then I sewed it to this big ric rac that I had in my stash. It was a pretty quick project and I think it turned out great. I put it away with the birthday decorations. I got it back out and thought, oh my goodness, this needs improved upon. I do not like to redo projects that I have made, and normally do not. I decided to make an exception to this project. I am on an applique kick right now. I decided to use an applique stitch and stitch around the letters. It took a bit of time but it was worth it.


You can see from this image that the letters just did not stand out and couldn't be read from very far away.


See the difference the black stitching makes.


I am so happy with the end product. I think the black around the lettering just makes it pop. It will be used for many birthdays to come. ( I should have ironed it before I took the picture).

Saturday, May 21, 2011

Upcycled Project Board


I have been needing a dry erase board to help keep me on track with my projects. Not wanting to spend a lot of (or any) money on the project, I upcycled an old frame. I left the frame black and added some scrapbook paper, vellum for a writing area and some ribbon. The lettering is vinyl rub ons from Hobby Lobby. I think it turned out cute for a free project. Hopefully it will keep me a little more on track and I can get a few more projects done.

Thursday, May 19, 2011

Birthday T-shirt


Our favorite 4 year old turned 5 this week. She woke up thinking she was going to school with her big brother, could now read, and was a whole lot taller. So funny. I am on anapplique kick right now and wanted to make her something special to celebrate her day. The birthday cake t-shirt was created. I drew out my design on paper and cut it out. Found cute fabric and followed my applique tutorial to get the design on the shirt. It took only about an hour from start to finish. The t-shirt is from Target and it was already pre-shrunk. She loved it and wore it to preschool today. I got an order for another one. Maybe I should start and etsy shop.

Monday, May 9, 2011

The Best Gift of Mother's Day


Mother' Day was so nice, no fighting children, no where to go, got to sleep in, we all had breakfast, lunch and dinner together. A wonderfuly day. My husband and kids finished off my Foodnetwork Bakeware Collection. This is not a paid opinion. I love the fooodntwork bake ware. It is awesome. All my gross rusty, aluminum peeling pans are gone. Now, only lovely, nonstick, evenly baking, shiny pans left in the cupboard. My favorite gift was the potted marigold from my favorite preschooler in the paper cup. I will be sad the Mother's Day I don't get one. Hope yours was a great day.


Wednesday, May 4, 2011

How to Machine Applique

Applique T-shirt So you want to learn how to applique. It is so easy. You can put any image on anything, from towels to t-shirts. I will be showing you how to applique a t-shirt. I made my own pattern up. But any line drawn image will work. I made this pattern up to match these cute capri's I found last summer on clearance at Gymboree.


These are the supplies you will need:

T-shirt

fabric scraps

pattern

Wonder-Under

basic sewing supplies

Fabric Stabilizer - There are different types of fabric stabilizers on the market, two I have used are washable stabilizer and a tear away stabilizer. I like the tear away stabilizer the best for knits. It gives a nice stiff sewing surface and keeps the fabric from moving.
Lets get started.

Iron a piece of fabric that will fit your pattern to the wonder-under. Trace your pattern pieces on to the paper side of the wonder under. Cut out your pattern. Peel off the paper side of the wonder-under. Position your pattern onto your t-shirt how you want it to look. (Make sure you are happy with it, once you iron it down, there is no changing it). The green piece went down first, then the pink triangles were layed down last. With a hot iron, iron down your pattern.


Cut a piece of fabric stabilizer big enough to fit your pattern and give about a 1/2 inch over. Put stabilizer underneath the pattern ( to the inside of the t-shirt). Pin in place at the sides.

Getting your machine ready:

Applique needs a satin stitch to be really pretty. You want a nice close zig-zag stitch, but longer your button hole stitch. I set my machine to the button hole setting but lengthen the stich to about a 5. You should experiment on a scrap of fabric before starting on your applique. Once you get a stitch you like,you are ready to begin.

For this project I chose thread that matched my fabric, but you can use any color you choose.

I start sewing with the top layer. I start at a spot easy to meet up with again. For the triangles, I started with the point and met back around at the point and slightly over lapped my stitching.

AFter I stitched around the triangles, I changed thread to green and stitched around the rind part.

When you are done sewing, clip threads close to stitching and carefully tear away fabric stabilizer. Turn t-shirt right side out. Go find your kid, put it on them and take a picture.


I loved the way it turned out and will be showing some more applique projects in the upcoming weeks. Happy Sewing.


Wednesday, April 27, 2011

Pillowcase Dress Tutorial #5,000


I realize that all blog land needs is another pillowcase dress tutorial. That is why mine is labeled #5,000. There must be that many out there. I think it is such a cute dress and is so easy to make. It is also my reference pattern. You see I have some cute alterations/adjustments I have been working on and need to have a starting place for these future posts.

Lets get started with some supplies:
1 to 1-1/2 yards of fabric depending onthe length of the dress
Bias tape either single-fold or double fold
thread to match.


1. Cutting - Decide on the finished length of your dress then add 2 and 1/2 inches. This allows for the casing and the hem. Fold fabric in half with selvedge edges matched up. Measure in 3 inches fromthe sides of the fabric and 6 inches down.


* I like to use the full width of the fabric. It makes the dress a little fuller and looks better.


*If you are making a size up to a 4. I like to only cut down 5 inches. It makes the arm hole a little smaller and less skin is showing at the sides.


Cut 2 pieces the same size. This is what your cut front and back pieces should look like.


1. For pocket pattern I just folded a piece of paper in half and made a half pocket shape and then cut it out, and trimmed it until I liked it. You can use a pattern piece from another pattern. Or skip this step all together.


3. Zig Zag edges of pocket. Fold in edges of pocket and iron in place. I decided to add a little ric-rac to mine.


4. Measure trim and stitch in place across the top of the pocket. Lay front of dress out flat and pin pockets in place.


4. Pin pocket to front of dress and stitch in place.


5. Stitch front to back at side seams. ( I don't seem to have a picture of this for some reason, sorry)).


6. Measure bias tape and cut to fit arm holes. Open up edge of bias tape and sew it to edge of fabric. This will hide the raw edge. I have found you can do this step with single-fold or double-fold bias tape. I happened to have this single-fold on hand and used it.


7. Iron arm facing to the inside.


5. Fold over and stitch arm facing in place, sewing close to edge.


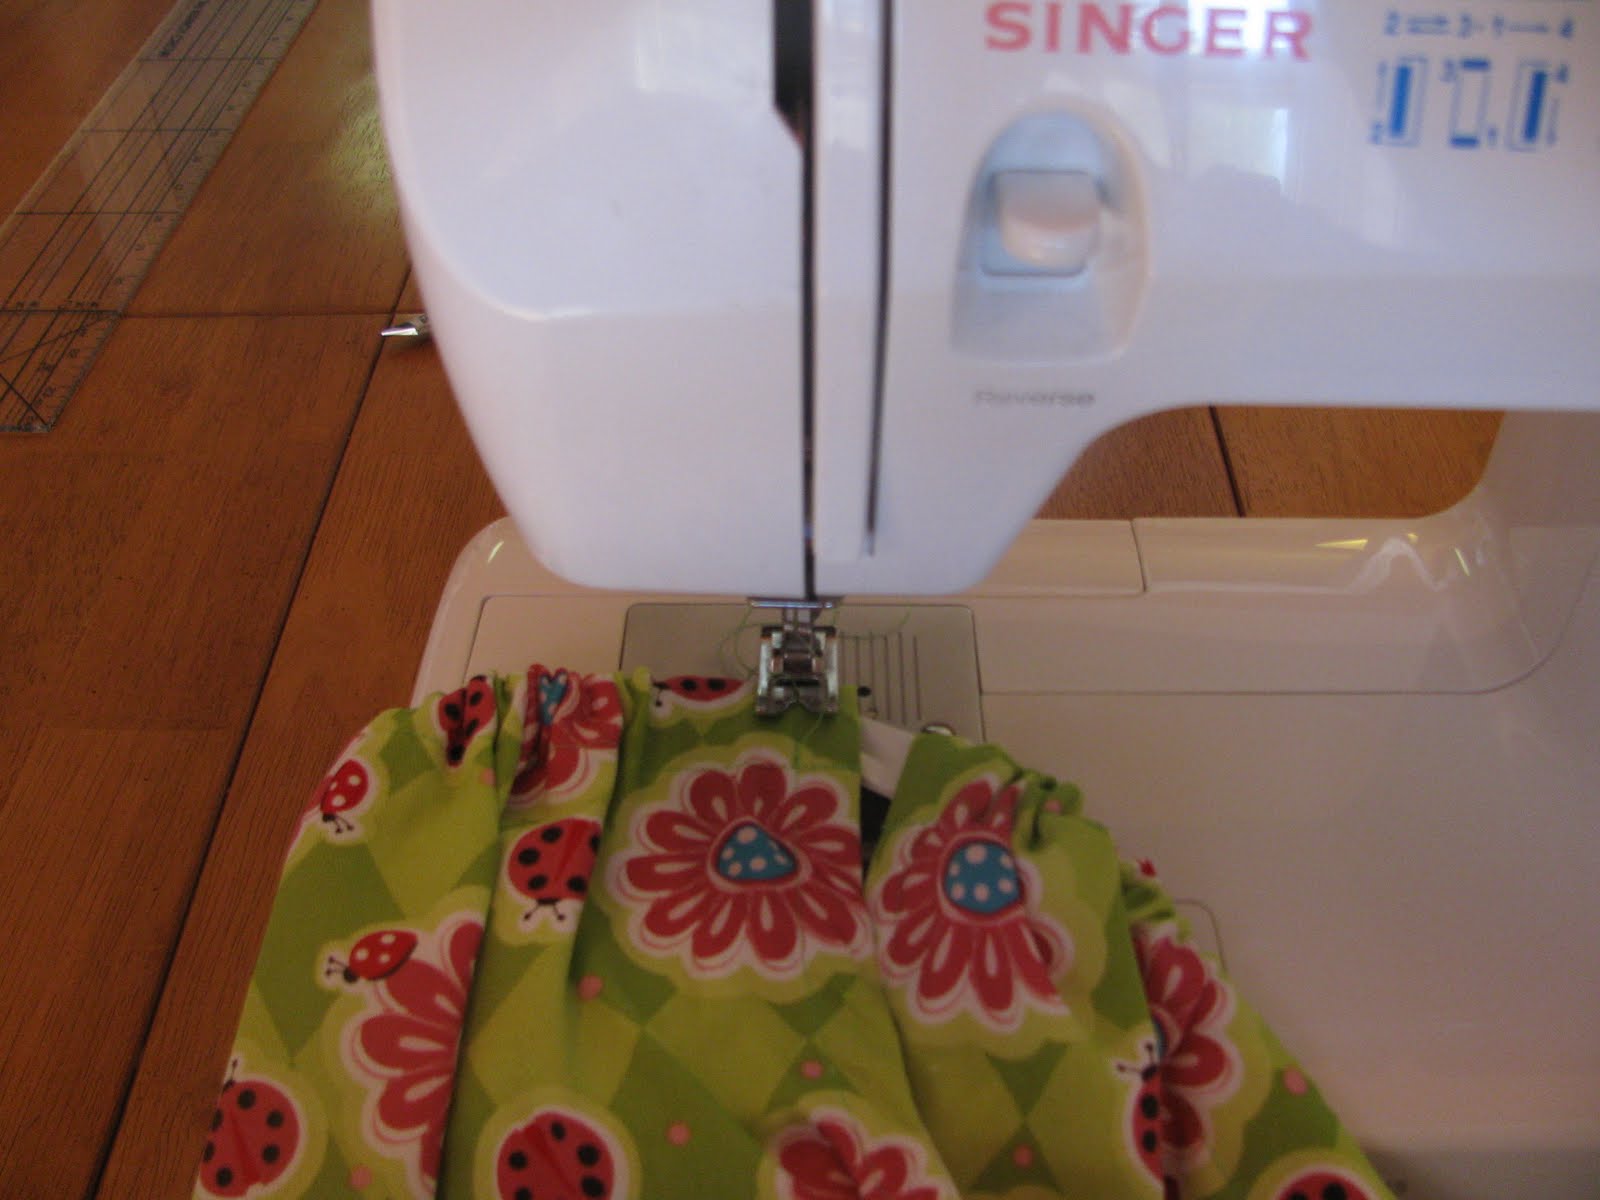
8. Casing - Fold over 1 1/4 inches and iron at the top of the dress to form the casing. Fold over 1/4 inch and iron raw edge ito the inside of the casing. Stitch in place on front and back.


7. Cut ribbon and thread through casing using a safety pin.


9. After threading ribbon through casing, adjust gathers and position front and back of dress. Stitch down casing to secure the ribbon at opposite side of the tie. I find this helps hold the dress in place and keeps it together.


Almost done, just the hem left. (I don't know what to do when I get a picture in the wrong place. I am a blogger and can't quite figure it out).


9. Hem - Measure for the proper length. Trim if needed. Zig Zag the bottom edge of the dress. Fold up a 1 - 1 1/2 inch hem and iron in place. Pin in hem and sew in place.


You are done. Now you have a super cute and comfy dress a little girl will love.